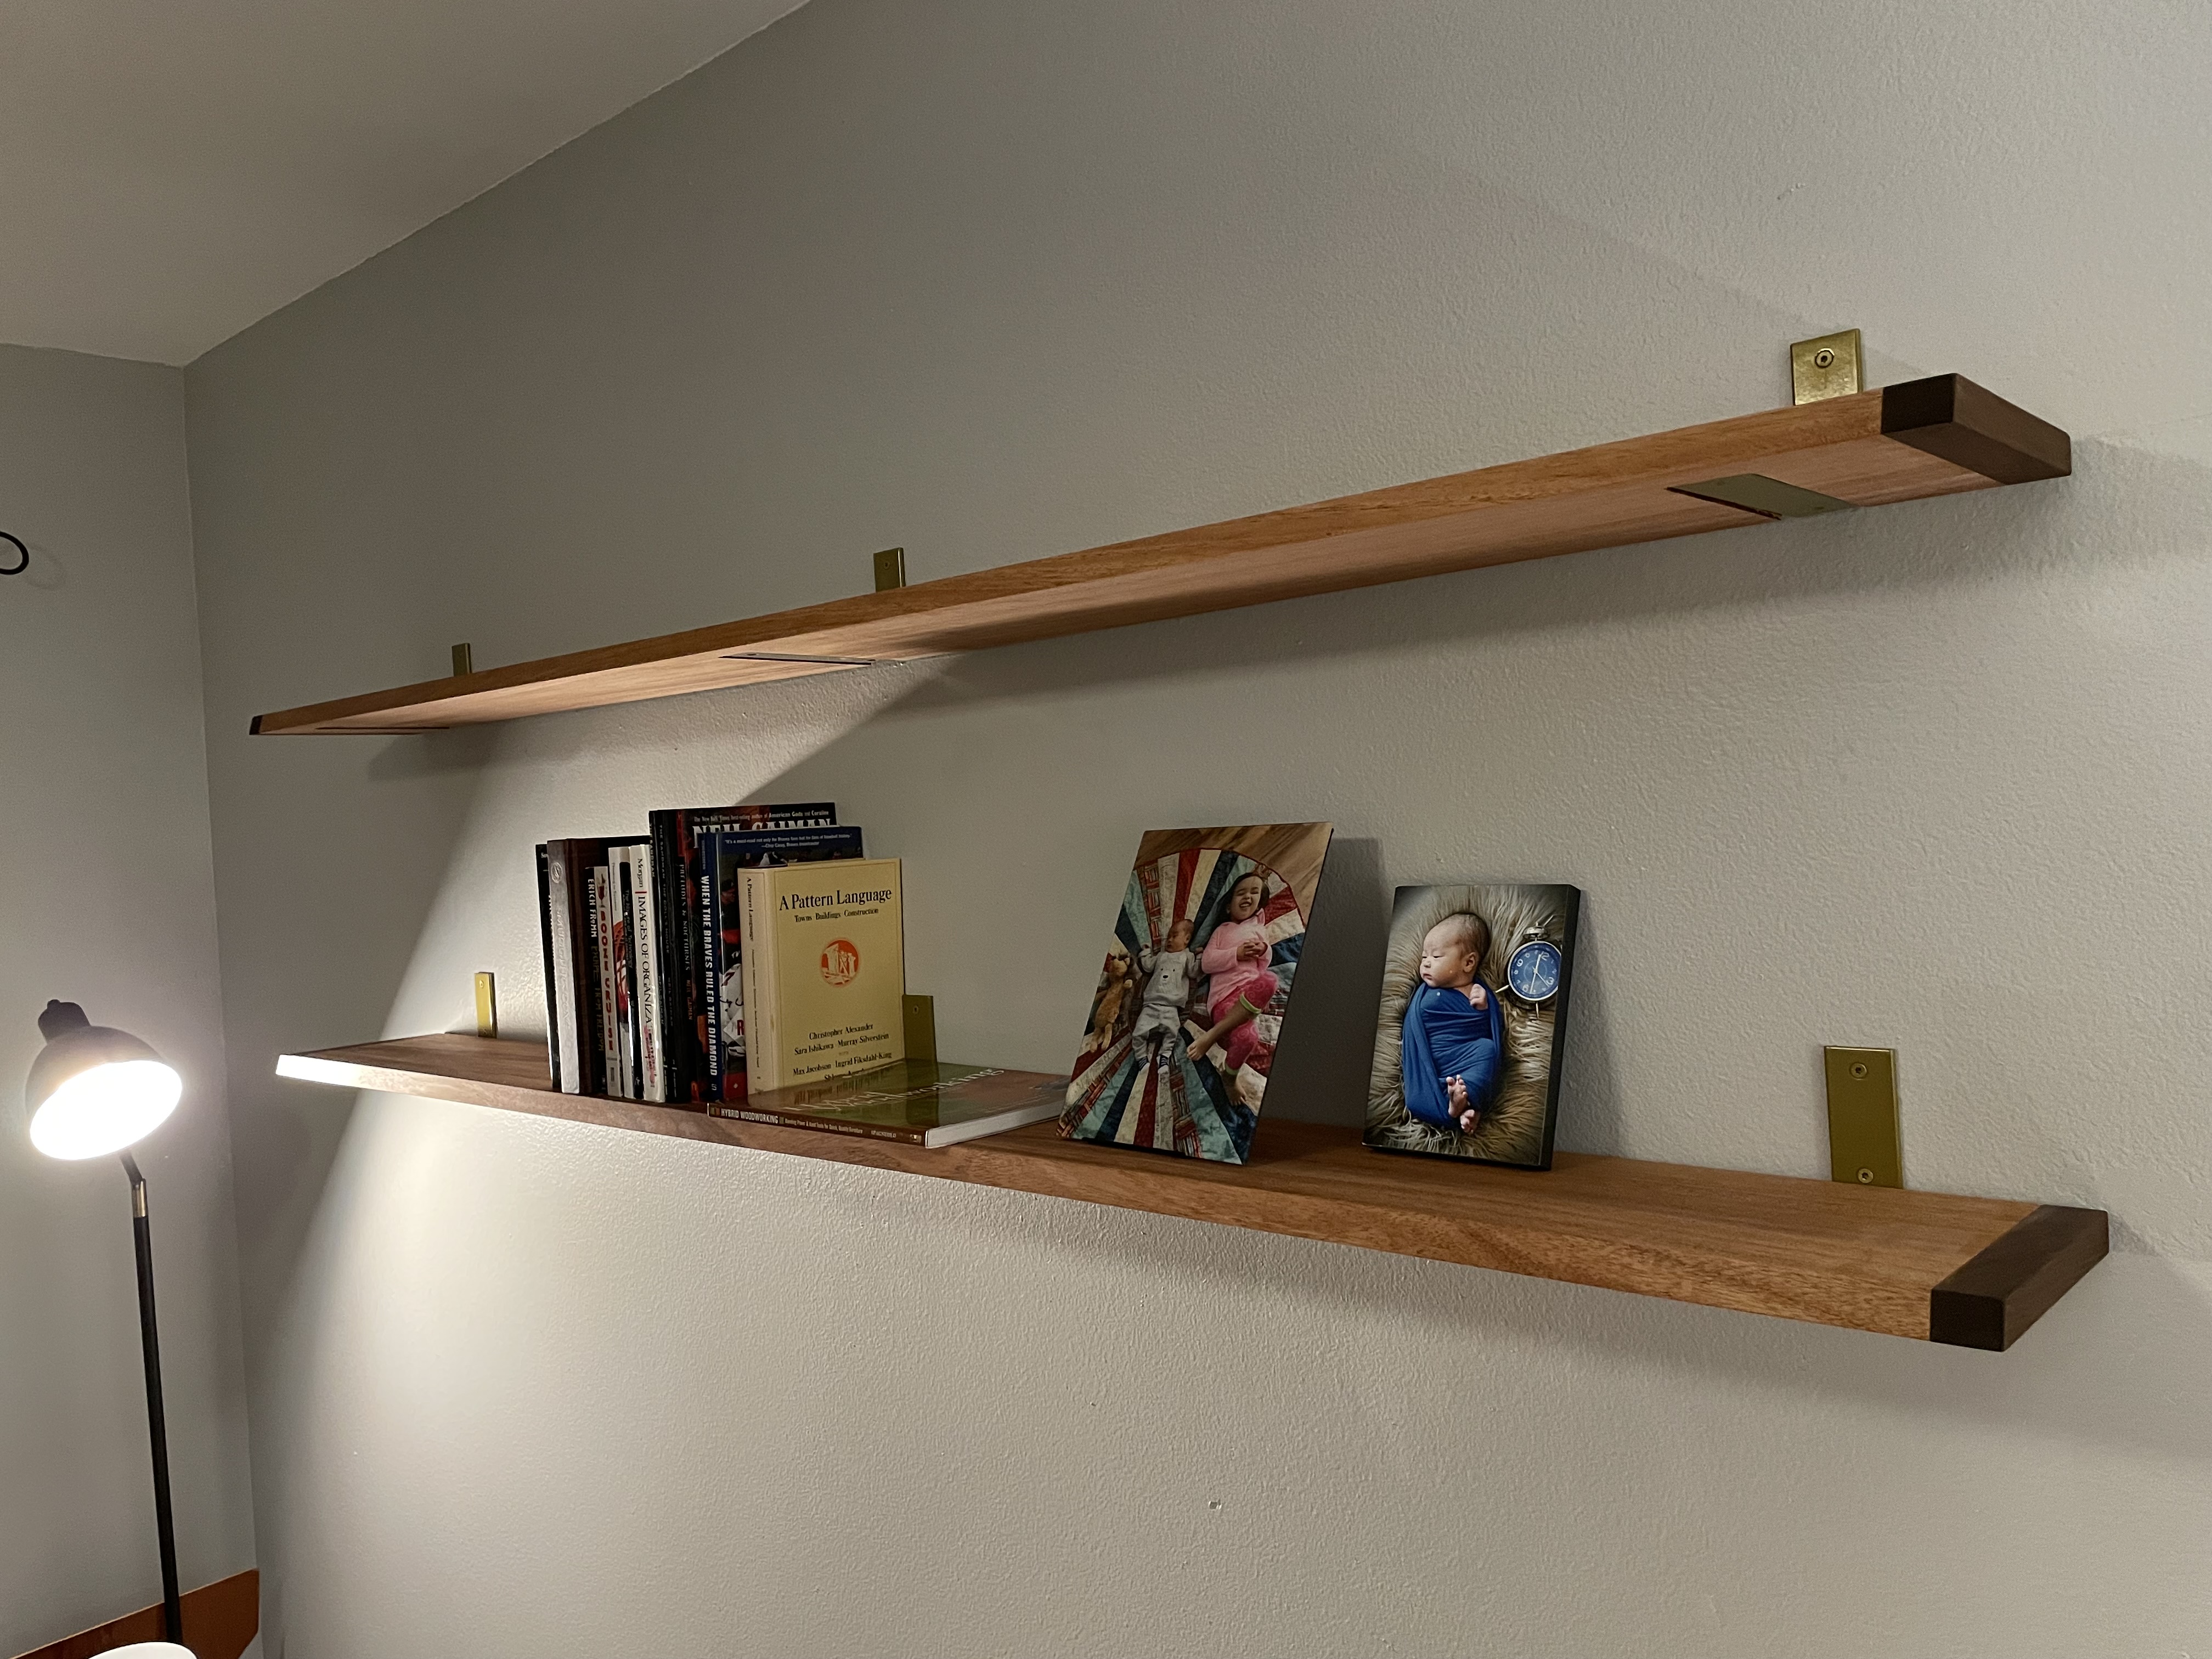
I had this long, wide, high-on-the-wall shelf in my office that was there since we moved in. I had wanted to take it down and do something different, but just left it there while I considered some alternatives. I considered a piece of furniture, moving my desk arrangement, and different variations of shelves that could work. Eventually I decided I wanted some simple, long shelves to give me plenty of space, and to put them up high over the reading chair area.
I wanted to get back to woodworking, and thought this would be a good chance to design something simple and work with some interesting hardwood.
Designing
With no idea exactly what stock to use, I headed to Anderson Lumber in St. Pete. My only requirements were rough dimensions: I wanted 2, each about 6’ long and at least 8-9“ of width to work from. Most of what’s available at lumber yards like Anderson is rough sawn, so you have to keep in mind having enough stock to work with to give you enough to meet your finished dimensions after milling, planing, and sanding is done.
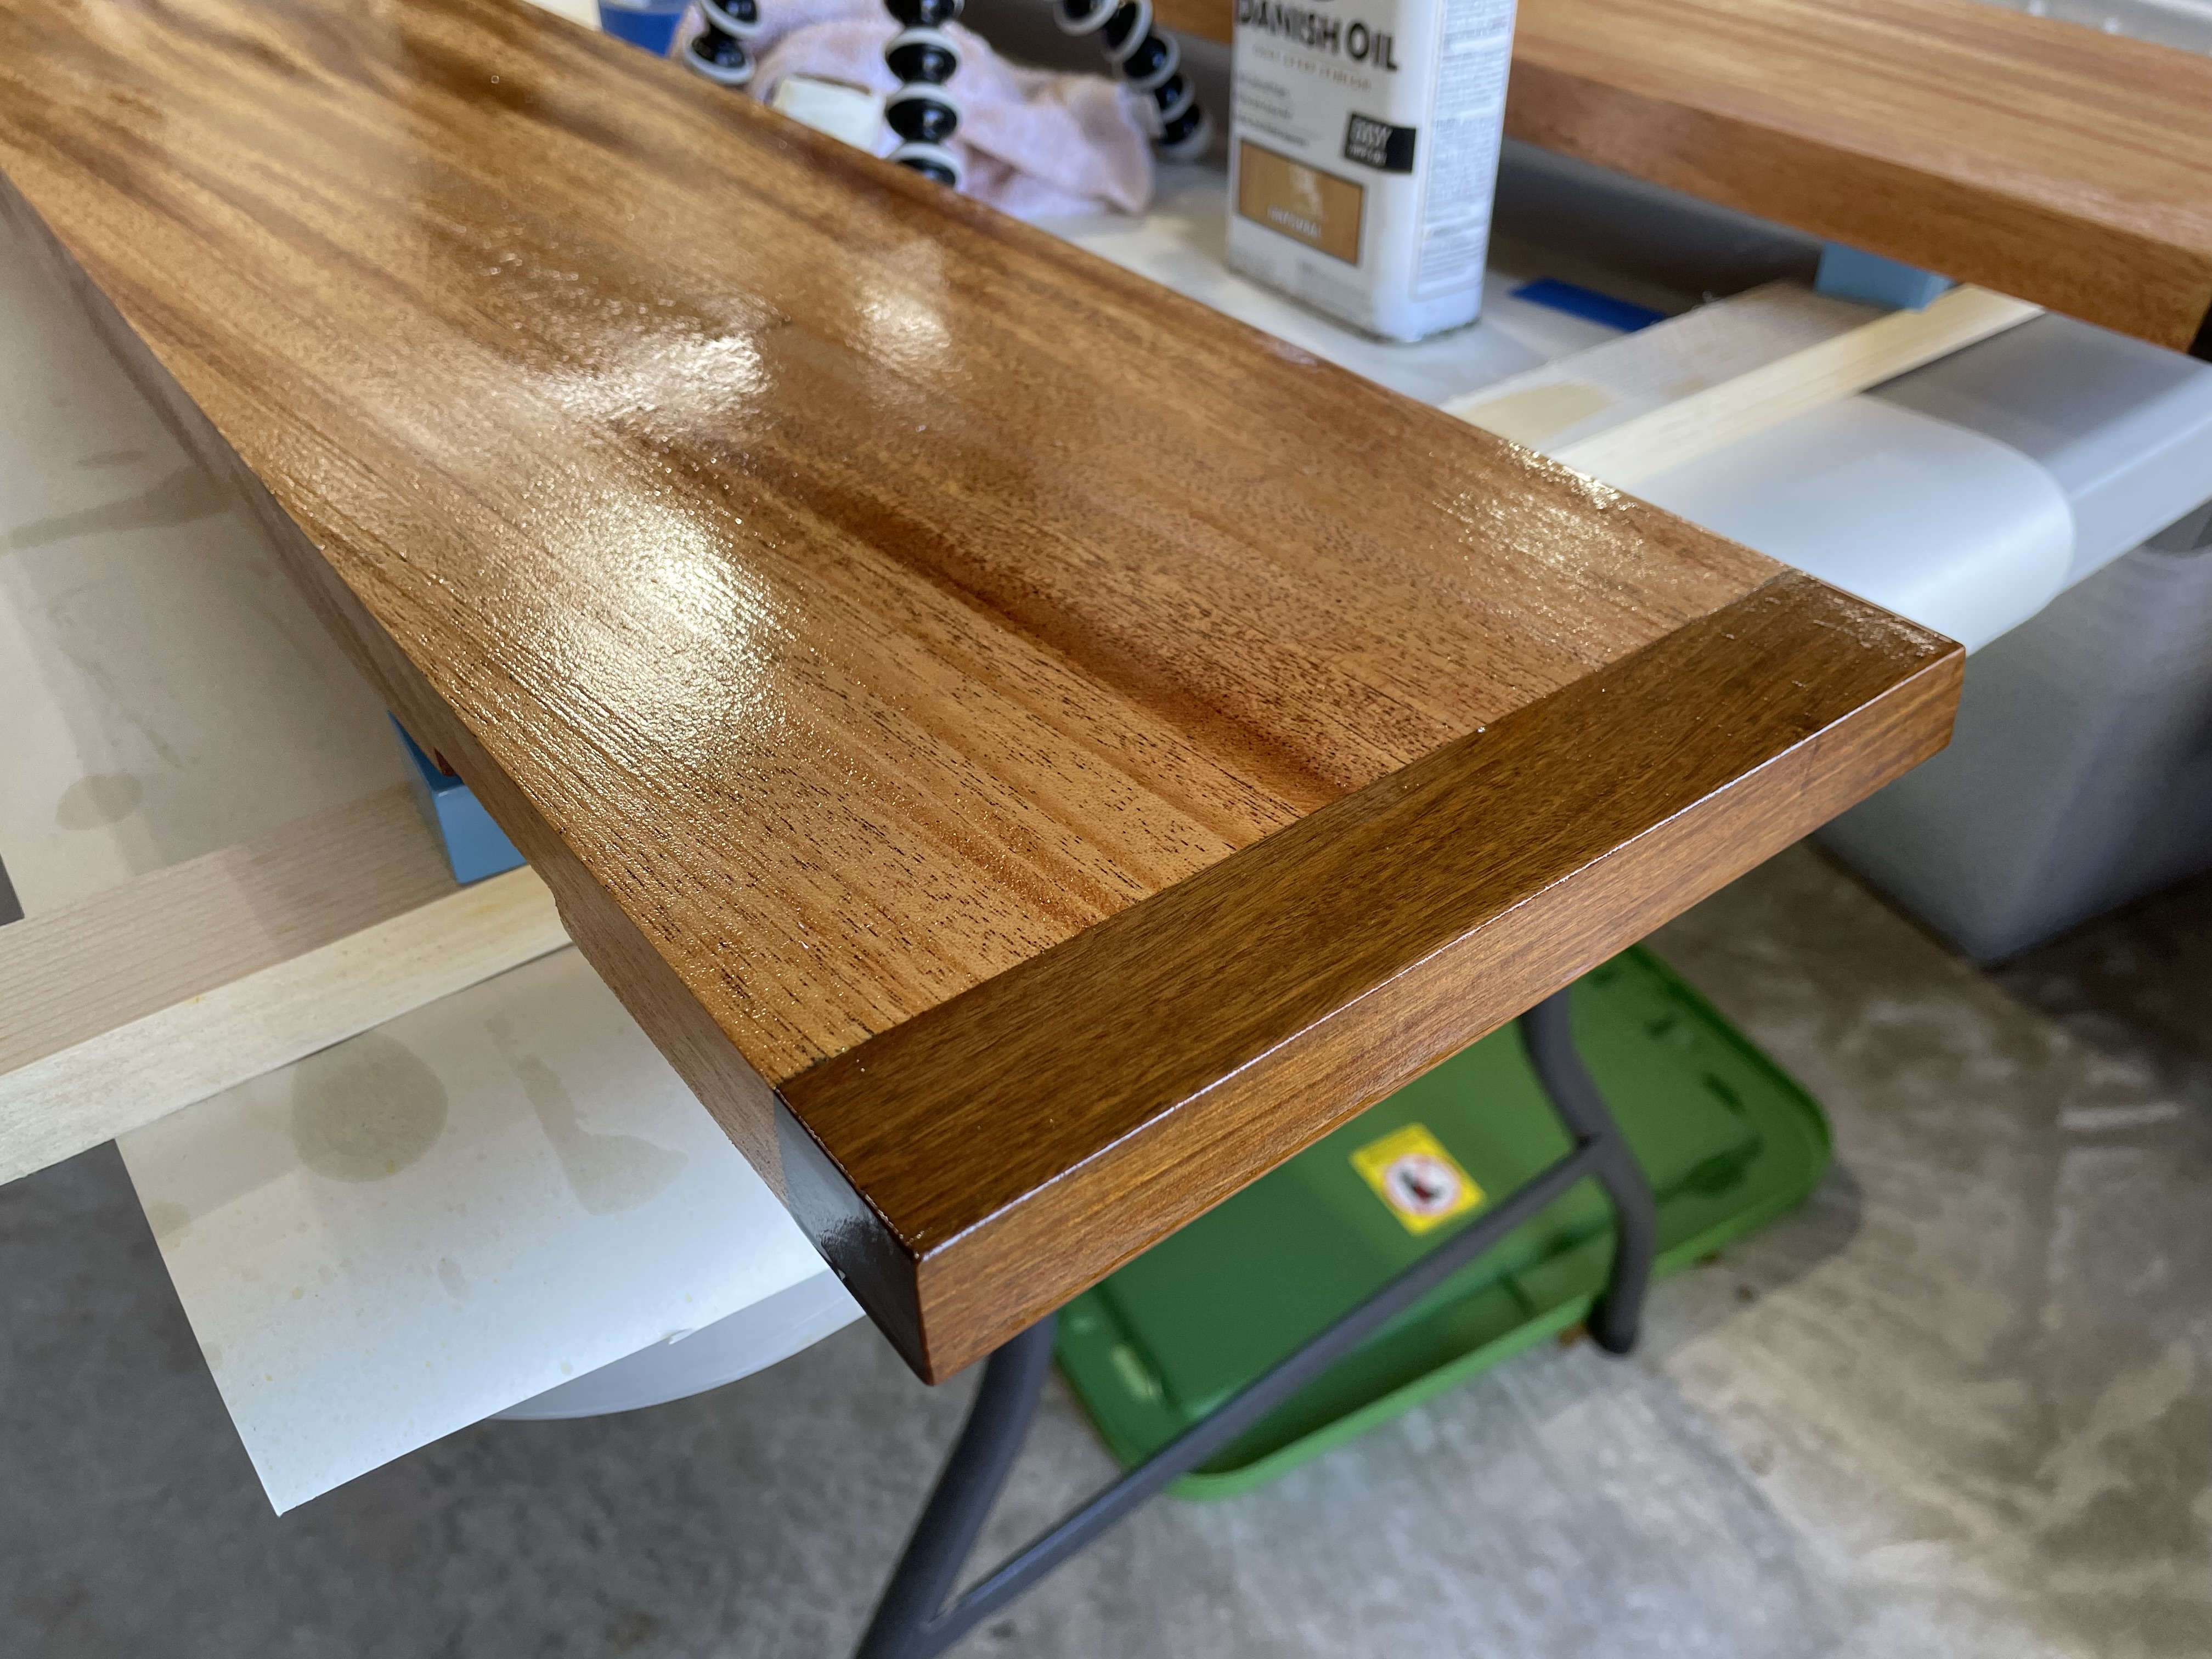
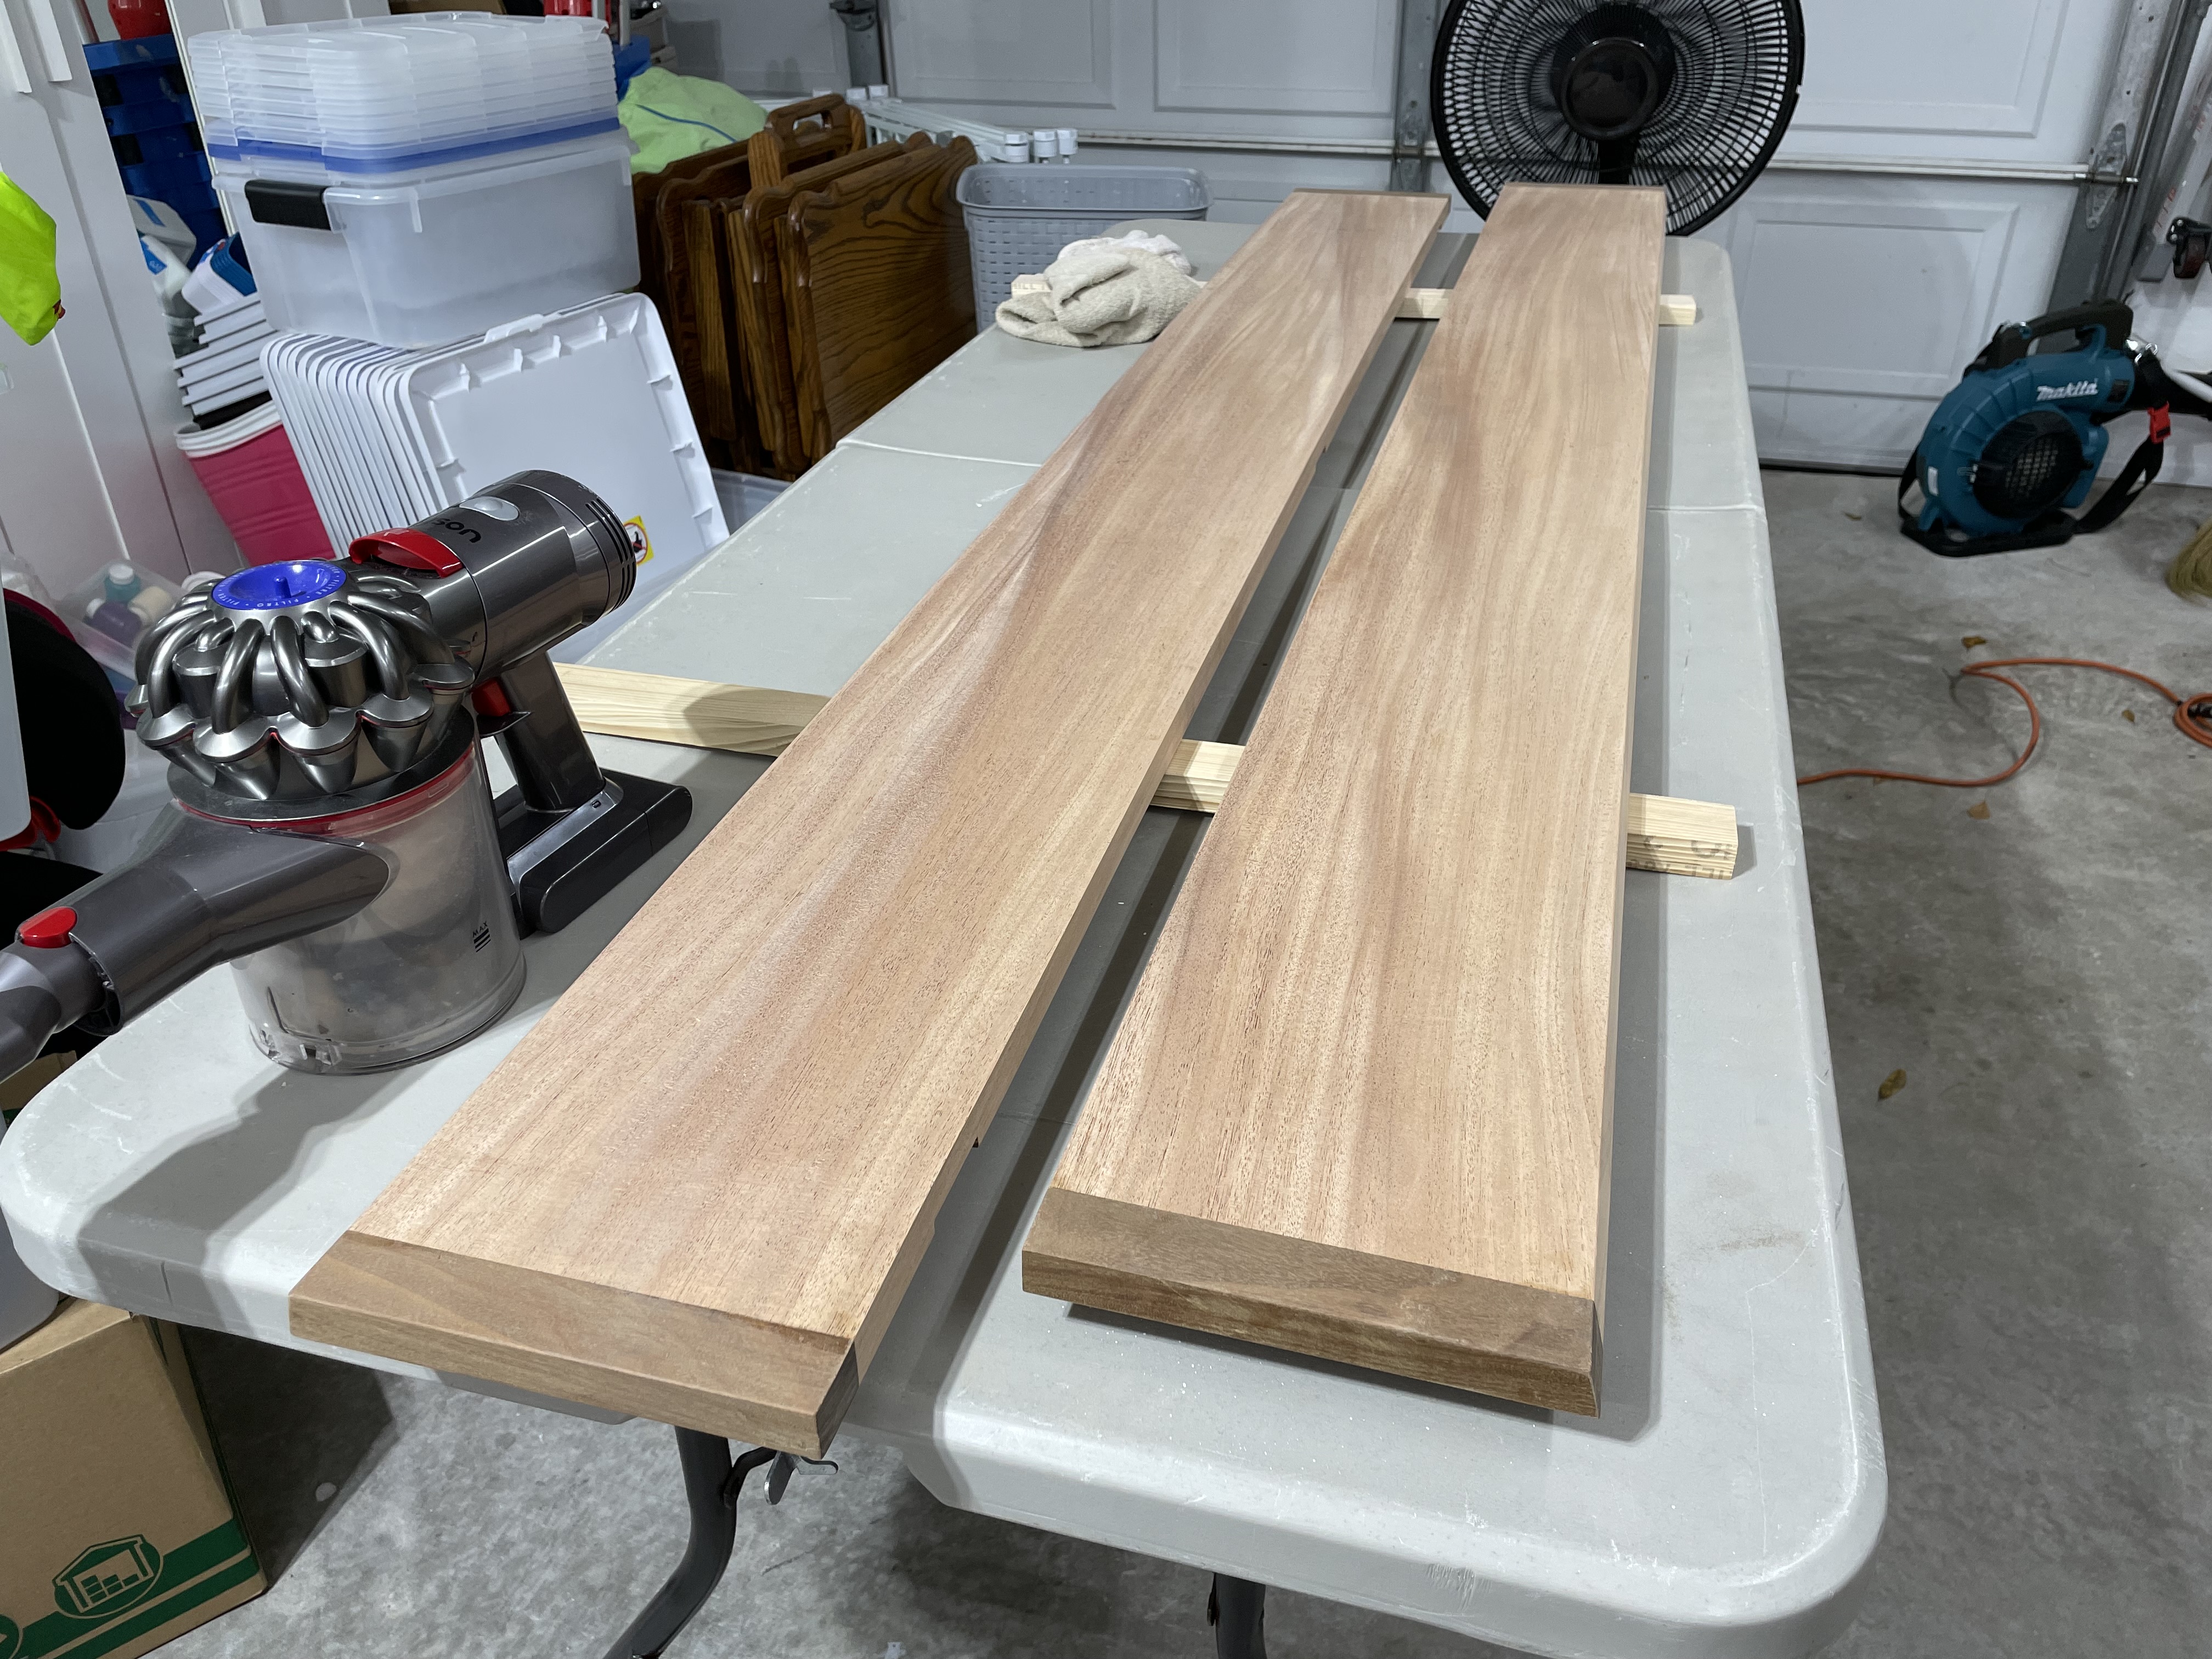
I found a single 14’ piece of sapele that fit my needs perfectly, so I had the guys there chop it in half to fit in my car. That gave me a couple of pieces about 7’ long, which gave me plenty of length to work with. Plus getting both pieces from a single stock was great for getting a grain match and color similarity to my two shelves. Sapele is an African species similar to mahogany, so the grain on it was excellent. My plan was to finish with an oil of some kind.
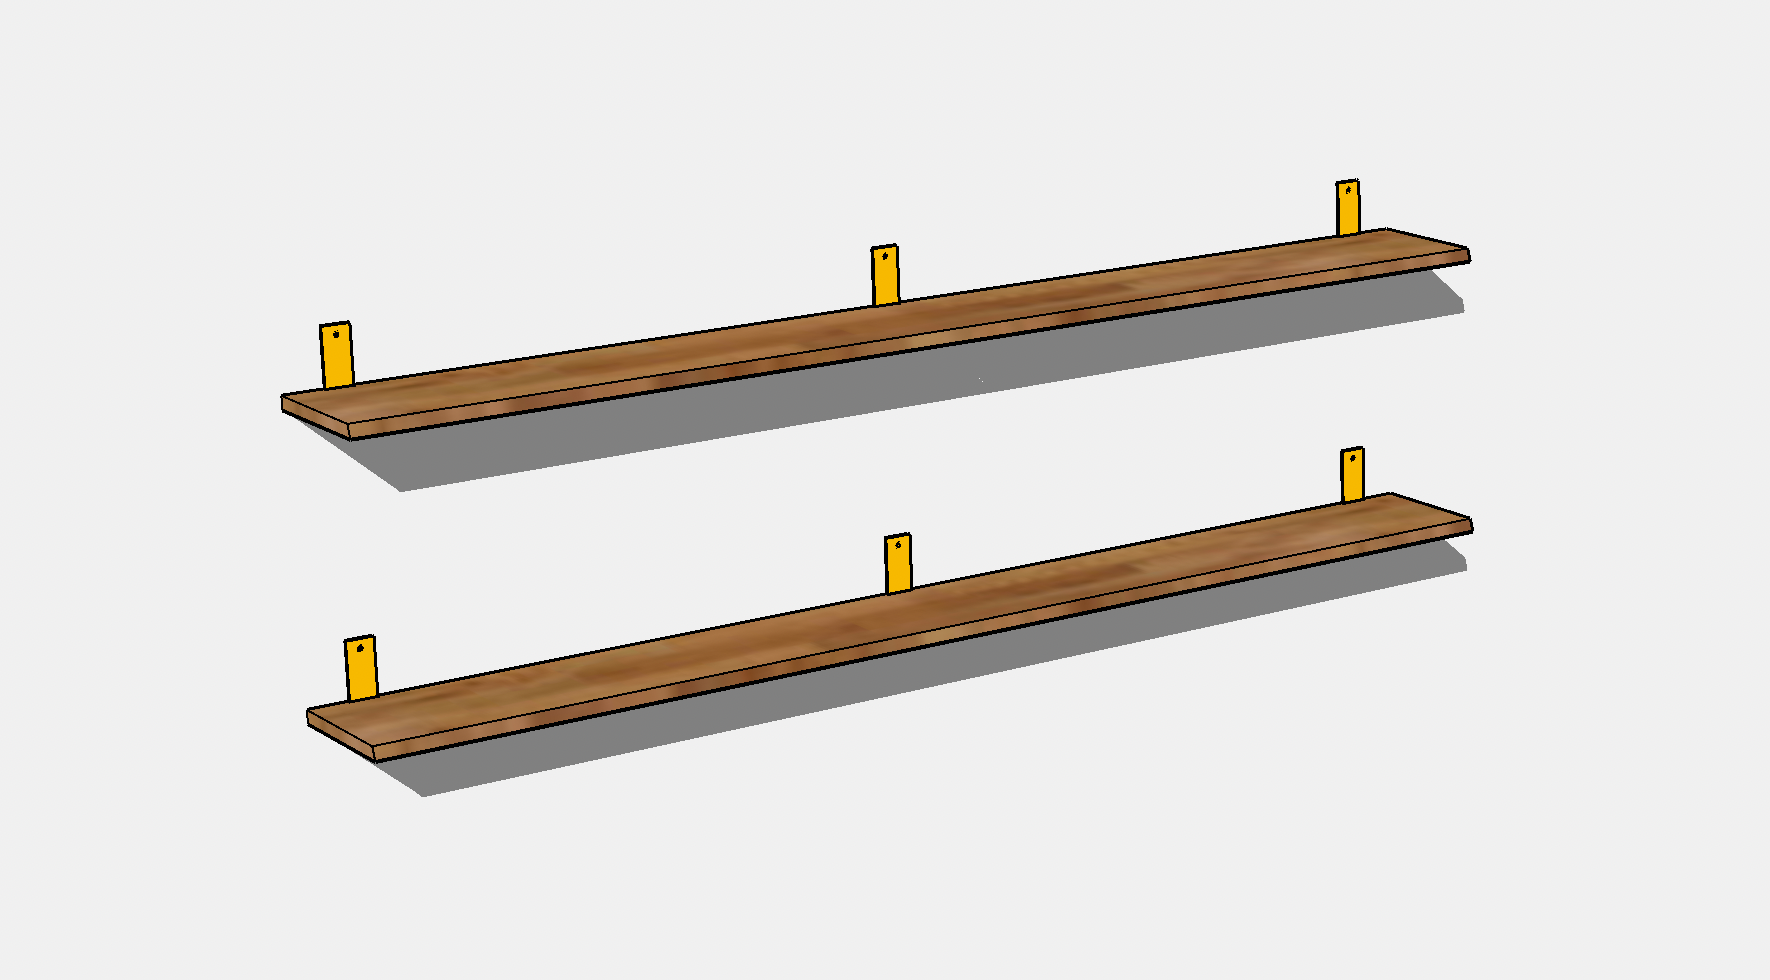
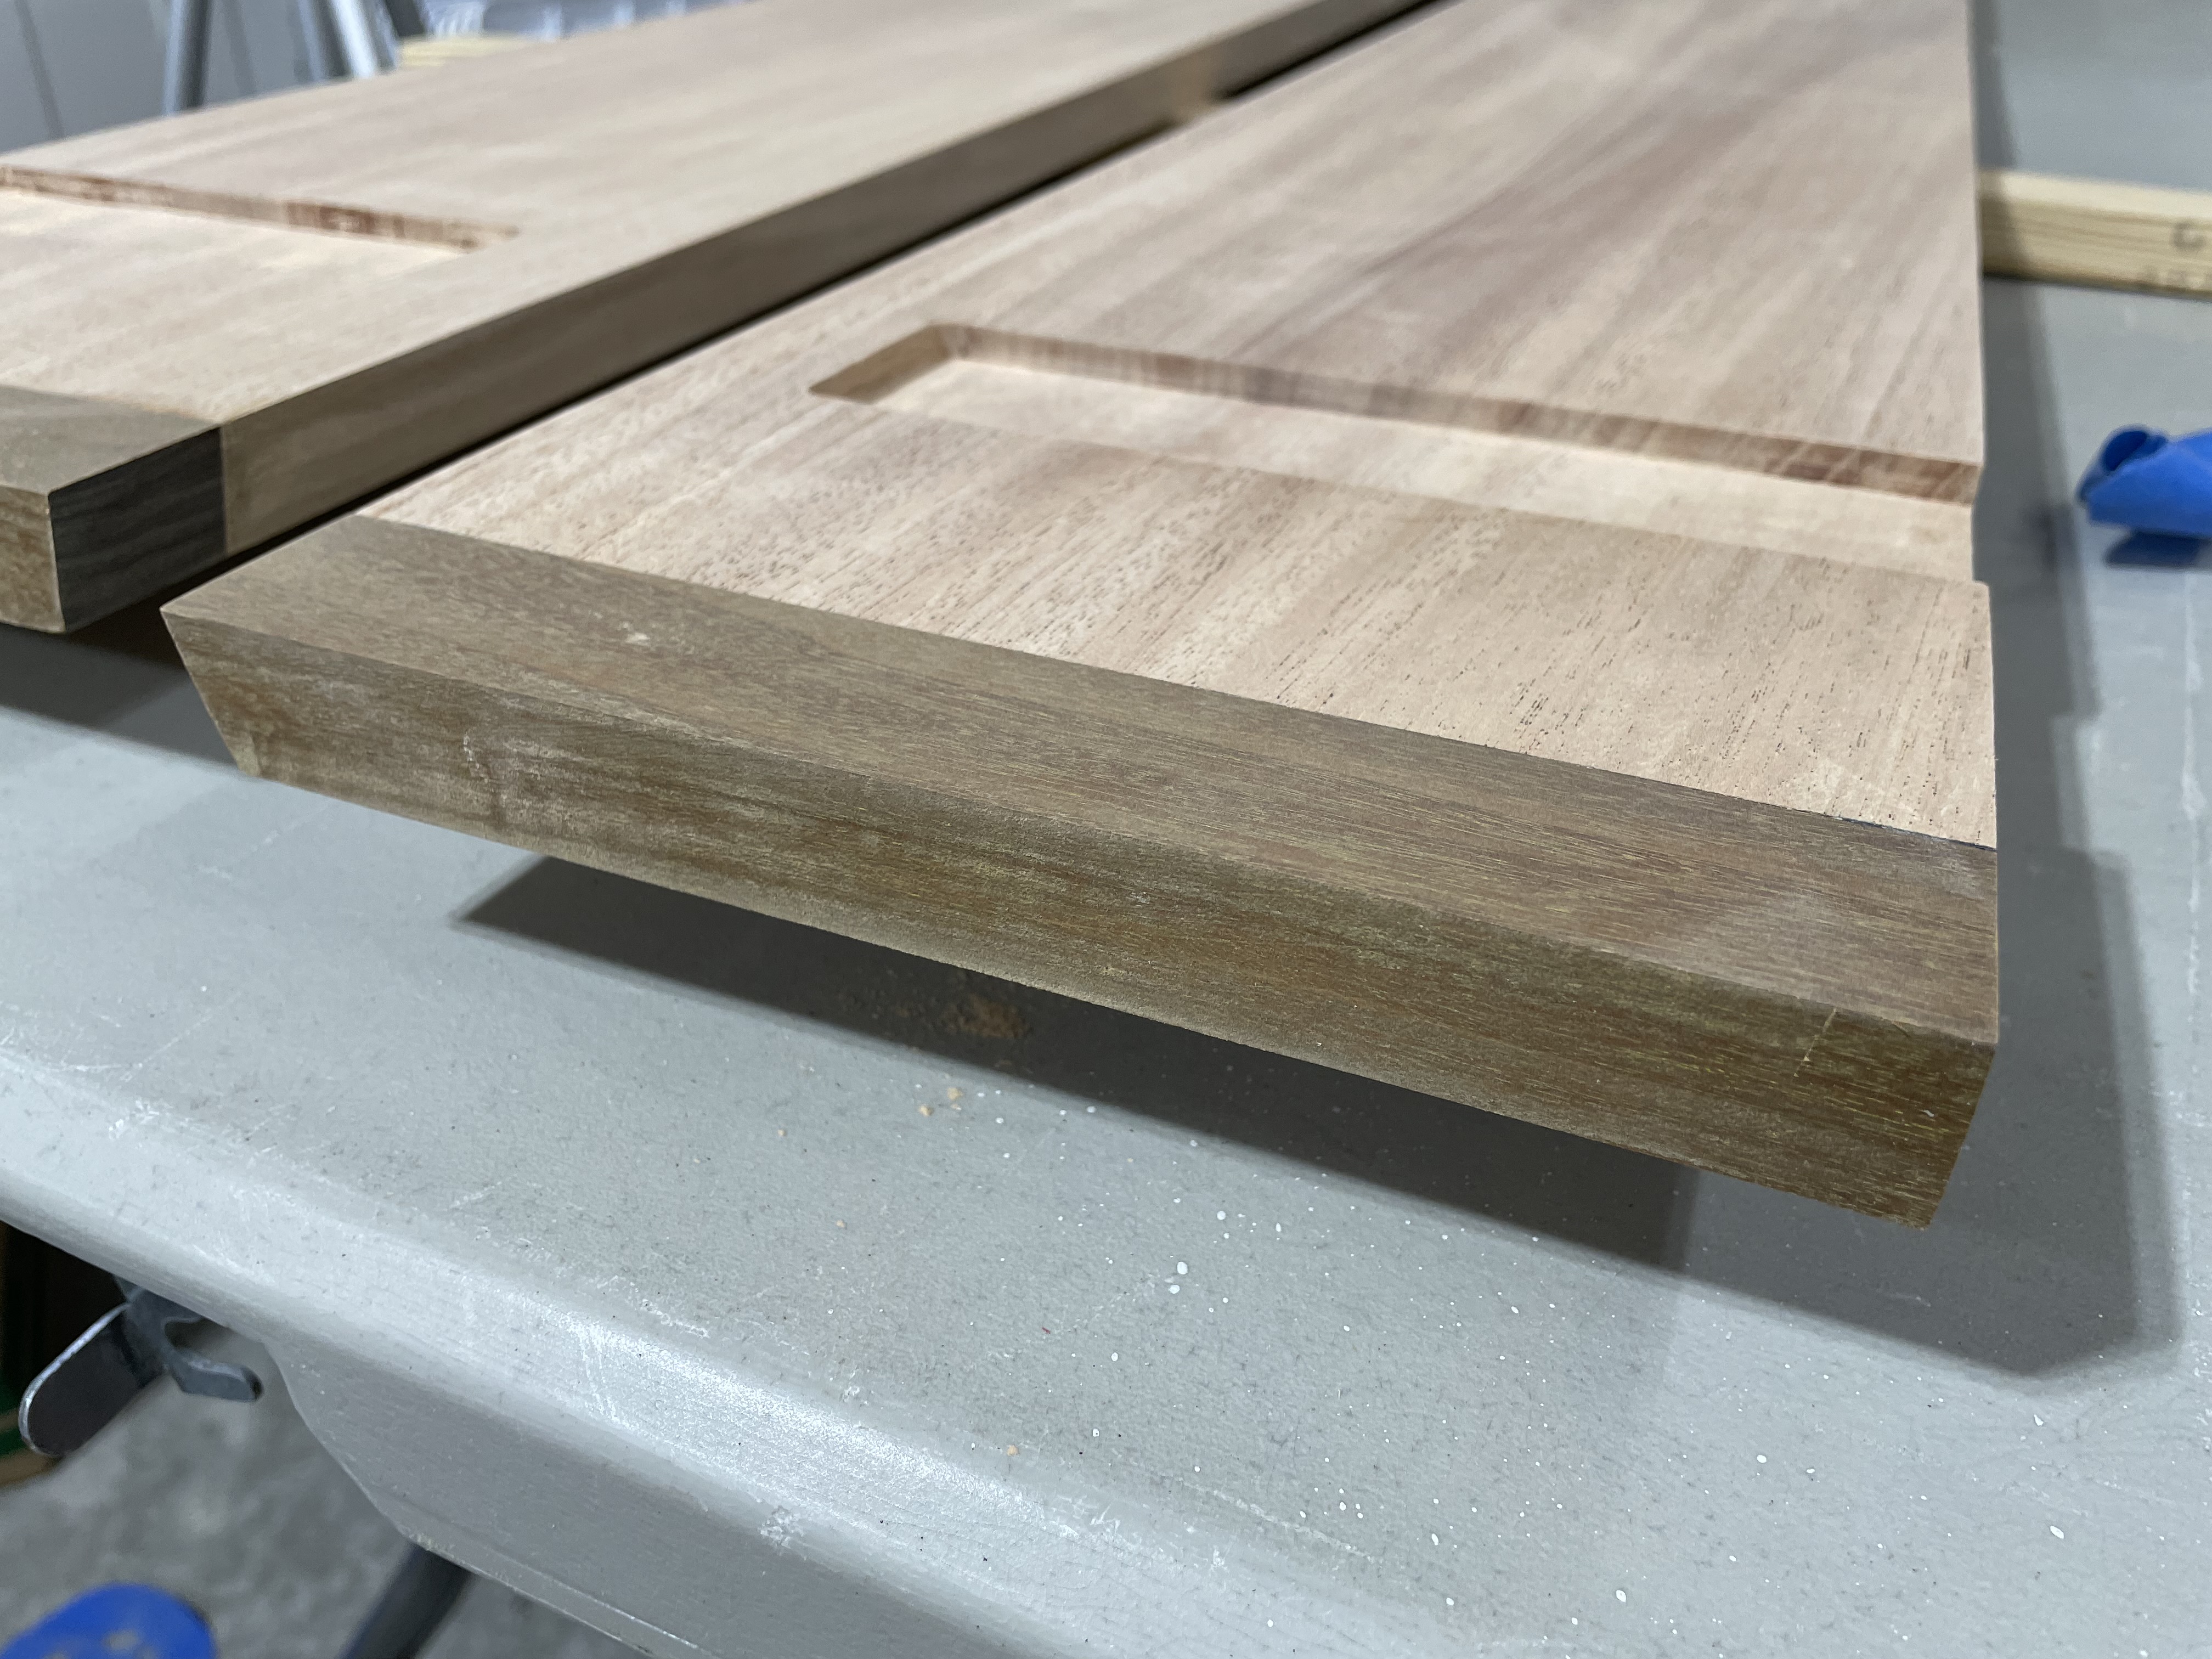
For mounting, I wanted to do something simple that would let the wood be the main feature, so I went with some brass brackets I found on Amazon. Really they’re “brass-colored steel”, which isn’t exactly what I wanted, but they look alright; they’re not that visible. If I was going for a design that had more prominent metal components, I’d have looked around more for brass options. I was even considering doing my own brass plating and soldering, but decided this was more about the wood. Though I would like to venture into some metalwork on a future project. All I had to do to get them the way I wanted was cut the upturned outer ends off so I could hide the brackets into routed channels. That way I’d end up with a floating shelf look, with only part of the wall strip visible.
Milling and cutting
The first step in the build process was to get the lumber cut to rough dimension and milled up. With no working jointer I just hand-planed one of the edges to get it as flat as possible and ripped it on the table saw get close to finished width. Then it was onto the planer to smooth out the rough texture and mill to final thickness.
In the office I first mounted the brackets so I had known, firm stud locations with good alignment on the wall location. Then I sat the boards up there to trace out the location for the bracket channels I needed to add with the router. Also, my wall isn’t what you’d call “flat”, so the brackets aren’t perfectly perpendicular. So I wanted to make sure I left enough channel width to have some play in there for positioning. If these shelves ever move to another wall with standard 16“ stud separation, they should be easily remountable.
I had this chunk of ipe laying around that I’d grabbed from a scraps bin years ago. Originally I was going to make an iPad stand from it, but never did. So I decided to try out making some breadboard ends to make the shelves a little more interesting, rather than just slabs of lumber. To keep it simple, and because these ends aren’t wide or load-bearing, instead of tenoning them fully onto the ends of the shelves, I just used a biscuit jointer and a couple of biscuits on each end. Without any long enough pipe clamps or straps, the glue-up for the breadboards got interesting:

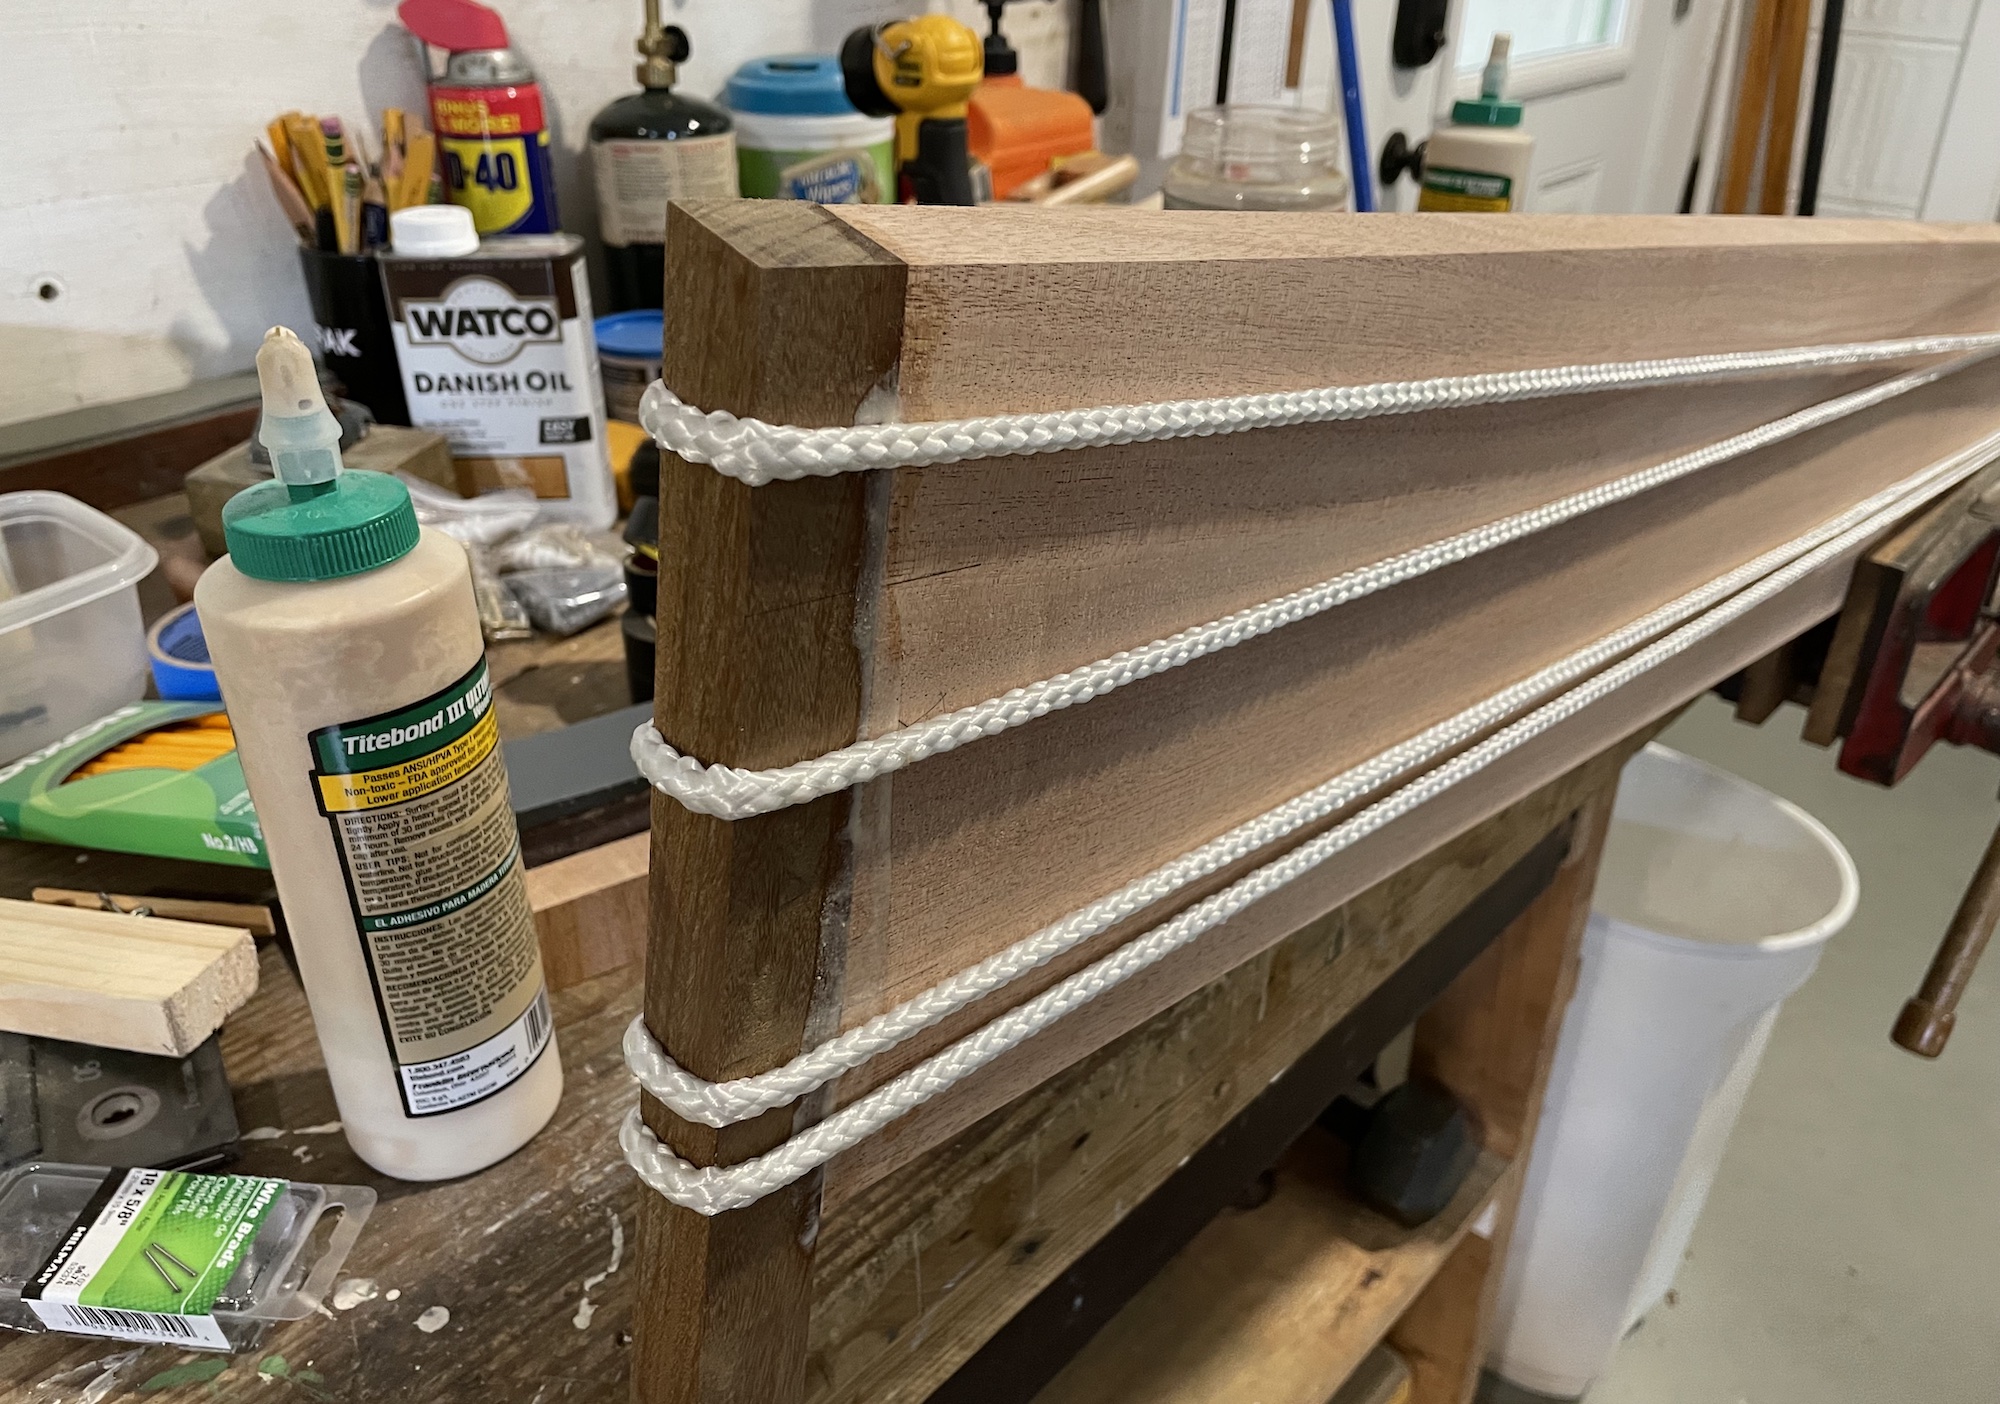
The ends were left a touch long on each end so we could do a hair-thin ripping pass on the table saw to even everything up.
The ipe provides nice contrast and is such an interesting material when you get it sanded down to a high grit. There’s a green iridescence that comes out when you get it nice and smooth that I love.
After everything was dry, the ends trimmed up, and my channels marked, I set to work on routing those channels to flush inset the brackets underneath. In the shop we built a plywood jig fit special to the palm router with a small straight bit. Proper jig-making is essential to idiot-proofing steps like this in your process. Routers can do hard-to-fix damage to your work if you aren’t careful, so it was worth the half hour we spent measuring everything and making the jig. Once all set, just clamp it on at the edge of the workbench, and follow the edges to eat away the material to make the channels. A few passes and the results were smooth and consistent.
With a final sanding of everything down to the finish grits, it was time for finish.
Finishing
My finish of choice was a Danish oil, which is really a combination of tung/linseed oil, varnish, and mineral spirits. With its thin consistency, you wipe it on in a thick coat and let it soak in for about a half hour, then wipe off the excess. I decided to do 3 coats, with light sanding at 400 grit or buffing with a rag in between each one.
The final product came out beautiful. After curing a day or so, I mounted them up on the wall.